
목차
728x90

1.STOMP(Simple Text Oriented Messaging Protocol)
텍스트 기반의 메시징 프로토콜으로 웹소켓과 함께 사용되어 클라이언트와 서버 간의 실시간 통신을 간편하게 구현할 수 있게 해준다.
STOMP 없이도 WebSocket으로 실시간 소통을 할수 있지만 메시지 라우팅, 구독, 인증 헤더 등이 필요하므로 STOMP를 선택했다.
1-1.STOMP 커맨드
STOMP는 다음과 같은 커맨드들을 지원한다.
| CONNECT | 서버와 연결 시작 |
| SEND | 메시지 발송 |
| SUBSCRIBE | 특정 채널(주제) 구독 |
| UNSUBSCRIBE | 채널 구독 해제 |
| MESSAGE | 서버 → 클라이언트 메시지 전송 |
| DISCONNECT | 연결 종료 |
| ERROR | 에러 메시지 전송 |
1-2. STOMP 메시지 구조
STOMP 메시지는 다음처럼 명령, 헤더, 본문 그리고 종료기호로 구성된다.
명령(Command)

헤더(Header)

본문(Body) + NULL 종료 문자SEND
destination:/topic/chat
content-type:text/plain
안녕하세요!
^@
2.Pub/Sub (Publish/Subscribe) 구조
Pub/Sub 방식은 발행자(Publisher)와 구독자(Subscriber) 간의 비동기적 메시지 전달 방식이다.
이 방식의 핵심은 보낼 사람과 받을 사람이 서로를 모른 채, 메시지를 중간 시스템이 전달한다는점에 있다.
Pub/Sub 구조에서는 다음과같은 용어를 사용한다.
| Publisher (발행자) | 메시지를 전송하는 주체. 이벤트를 발생시킴 |
| Subscriber (구독자) | 특정 주제(topic)에 관심이 있어 그걸 구독하고 기다리는 주체 |
| Broker (중개자) | 발행자와 구독자 사이에서 메시지를 전달해주는 역할 |
| Topic / Channel | 메시지가 오가는 경로, 하나의 메시지 주제 |
2-1.방식
pub/sub 방식에서는 보낼 사람과 받을 사람이 서로를 모르고 topic에 구독한사람에게 발행하는 형식이다.
만약 다음 처럼 구독자가 topic/channel을 구독했으면
client.subscribe('/topic/notice')
발행자가 해당 topic에 메시지를 발행했을때 브로커가 그 topic을 구독하고 있던 모든 클라이언트에게 메시지를 전달한다.
이 방식때문에 동시에 여러 구독자에게 메시지를 비동기로 전송 가능하여, 채팅방,알림과 같은 방식에서 STOMP + WebSocket에서 많이 쓰인다.
client.send('/app/notice', {}, '공지사항입니다')
3.SpringBoot
웹소켓을 사용하기 위해 사용한 의존성은 다음과같다.
implementation 'org.springframework.boot:spring-boot-starter-websocket'3-1.WebSocketConfig
STOMP + WebSocket + SockJS + JWT 인터셉터를 사용하여 실시간 메시징을 구성하기 위한 WebSocket 설정을 위한 클래스다.
@Configuration
@EnableWebSocketMessageBroker // 웹소켓 메시지 브로커 활성화
public class WebSocketConfig implements WebSocketMessageBrokerConfigurer {
    @Autowired
    private JwtHandshakeInterceptor jwtHandshakeInterceptor;

    @Override
    public void configureMessageBroker(@NonNull MessageBrokerRegistry config) {
        config.enableSimpleBroker("/topic");
        config.setApplicationDestinationPrefixes("/app");
    }

    @Override
    public void registerStompEndpoints(@NonNull StompEndpointRegistry registry) {
        registry.addEndpoint("/ws")
                .setAllowedOrigins("http://localhost:5173", "http://localhost:8080", "http://127.0.0.1:3000")
                .addInterceptors(jwtHandshakeInterceptor)
                .withSockJS();
    }

}
configureMessageBroker
해당 메서드는 MessageBroker에 대한 설정을 해준다.
enableSimpleBroker("/topic") 통해 메시지를 구독자에게 브로드캐스트할 때 사용하는 내장 브로커 활성화하였다.
(/topic/chatroom/1 과같은 형식으로 구독가능)
setApplicationDestinationPrefixes("/app")을 통해 클라이언트가 서버로 보내는 메시지의 prefix 설정을 하였다.
(클라이언트가 /app/sendMessage로 보내면, 컨트롤러의 @MessageMapping("/sendMessage")로 라우팅)
@Override
public void configureMessageBroker(@NonNull MessageBrokerRegistry config) {
    config.enableSimpleBroker("/topic");
    config.setApplicationDestinationPrefixes("/app");
}
registerStompEndpoints
Stomp의 엔드포인트와 관련된 설정을 하는 엔드포인트다.
| addEndpoint("/ws") | 클라이언트가 WebSocket 연결을 시작할 엔드포인트 경로 |
| setAllowedOrigins(...) | CORS 허용 도메인을 명시 |
| addInterceptors(...) | WebSocket 연결 시 실행될 JWT 인증 인터셉터를 등록 |
| withSockJS() | 브라우저가 WebSocket을 지원하지 않을 경우 대체 방식(XHR 등)을 자동으로 지원 |
@Override
public void registerStompEndpoints(@NonNull StompEndpointRegistry registry) {
    registry.addEndpoint("/ws")
            .setAllowedOrigins("http://localhost:5173", "http://localhost:8080", "http://127.0.0.1:3000")
            .addInterceptors(jwtHandshakeInterceptor)
            .withSockJS();
}
지금을 보면 다음과같은 흐름도로 작동할 것이다.
[클라이언트] --(웹소켓/STOMP 연결 시도)--> /ws
                       │
                       ▼
       [JwtHandshakeInterceptor] → JWT 토큰 검증 (WebSocket 핸드셰이크 중)
                       │
                       ▼
       [STOMP 연결 완료 후 메시지 송수신 시작]
                       │
                       ├──▶ SEND → /app/message
                       │           │
                       │           ▼
                       │   @MessageMapping("/message") → 서버 로직 수행
                       │                           │
                       │                           └→ 결과를 /topic/chatroom으로 전송
                       │
                       └──▶ SUBSCRIBE → /topic/chatroom
                                   │
                                   ▼
                          브로커가 구독 중인 클라이언트들에게 메시지 PUSH
3-2.JwtHandshakeInterceptor
WebSocket 연결 시 JWT 기반 인증을 처리하는 클래스이다.
지금은 쿼리스트링으로 JWT를 받아처리하는 방식으로 구현하였다.
@Component
@Slf4j
public class JwtHandshakeInterceptor implements HandshakeInterceptor {

    private final JwtTokenProvider jwtTokenProvider;

    @Autowired
    public JwtHandshakeInterceptor(JwtTokenProvider jwtTokenProvider) {
        this.jwtTokenProvider = jwtTokenProvider;
    }

    @Override
    public boolean beforeHandshake(ServerHttpRequest request, ServerHttpResponse response,
                                 WebSocketHandler wsHandler, Map<String, Object> attributes) throws Exception {
        // Query parameter에서 토큰 추출
        String token = getTokenFromQuery(request);

        if (token != null && jwtTokenProvider.validateToken(token)) {
            // 토큰이 유효하면 사용자 정보를 attributes에 저장
            String email = jwtTokenProvider.getEmailFromToken(token);
            String role = jwtTokenProvider.getRoleFromToken(token);
            Long userId = jwtTokenProvider.getIdFromToken(token);

            attributes.put("email", email);
            attributes.put("role", role);
            attributes.put("userId", userId);
            return true;
        }
        log.error("No token found in query parameters");
        return false; // 인증 실패시 연결 거부
    }

    private String getTokenFromQuery(ServerHttpRequest request) {
        String query = request.getURI().getQuery();
        if (query != null) {
            String[] params = query.split("&");
            for (String param : params) {
                if (param.startsWith("token=")) {
                    return param.substring(6); // "token=" 제거
                }
            }
        }
        return null;
    }

    @Override
    public void afterHandshake(ServerHttpRequest request, ServerHttpResponse response,
                             WebSocketHandler wsHandler, Exception exception) {
        // 핸드셰이크 후 처리 (필요시)
    }
}
beforeHandshake
WebSocket 핸드셰이크이전에 작업하는 메서드이다. (true 반환시 연결허용, false 반환시 연결 거부)
요청 URL의 쿼리 파라미터에서 token을 추출하고, token을 기반으로 email,role,userId를 뽑아서 attributes 맵에 넣어서
WebSocket 세션에 저장하고 true를 반환해 연결을 허용하고, token이 유효하지않거나 없으면 false를 반환한다.
@Override
public boolean beforeHandshake(ServerHttpRequest request, ServerHttpResponse response,
                             WebSocketHandler wsHandler, Map<String, Object> attributes) throws Exception {
    // Query parameter에서 토큰 추출
    String token = getTokenFromQuery(request);

    if (token != null && jwtTokenProvider.validateToken(token)) {
        // 토큰이 유효하면 사용자 정보를 attributes에 저장
        String email = jwtTokenProvider.getEmailFromToken(token);
        String role = jwtTokenProvider.getRoleFromToken(token);
        Long userId = jwtTokenProvider.getIdFromToken(token);

        attributes.put("email", email);
        attributes.put("role", role);
        attributes.put("userId", userId);
        return true;
    }
    log.error("No token found in query parameters");
    return false; // 인증 실패시 연결 거부
}
getTokenFromQuery
URL 쿼리스트링에서 token값을 추출해내기 위한 메서드
private String getTokenFromQuery(ServerHttpRequest request) {
    String query = request.getURI().getQuery();
    if (query != null) {
        String[] params = query.split("&");
        for (String param : params) {
            if (param.startsWith("token=")) {
                return param.substring(6); // "token=" 제거
            }
        }
    }
    return null;
}
afterHandshake
핸드셰이크 이후의 작업을 정의할 수 있는 메서드인데 따로 만들지는않았다.
(필수 오버라이드 해야하는 메서드라 스켈레톤코드로 구현만 해놨다.)
@Override
public void afterHandshake(ServerHttpRequest request, ServerHttpResponse response,
                         WebSocketHandler wsHandler, Exception exception) {
    // 핸드셰이크 후 처리 (필요시)
}
3-3.MessageWebSocketController
메시지 처리 로직을 구현하는 Controller다.
@RestController로 하면 안되기 때문에 @Controller로 만들었다.
@Controller
@RequiredArgsConstructor
public class MessageWebSocketController {
    private final SimpMessagingTemplate messagingTemplate;
    private final MessageService messageService;

    @MessageMapping("/chat/send")
    public void sendMessage(MessageCreateRequestDto requestDto, SimpMessageHeaderAccessor headerAccessor) {
        Long senderId = (Long) headerAccessor.getSessionAttributes().get("userId");
        MessageResponseDto savedMessage = messageService.sendMessage(requestDto,senderId);
        messagingTemplate.convertAndSend("/topic/chat/" + requestDto.getChatRoomId(), savedMessage);
    }
}
클라이언트가 /app/chat/send 경로로 전송한 메시지를 처리하는 메서드를 선언하기위해 다음처럼 설정한다.
@MessageMapping("/chat/send")
SimpMessageHeaderAccessor headerAccessor를 매개변수로 받아서 헤더에 있는 추가 정보를 얻을 수있다.
이를 통해 headerAccessor.getSessionAttributes().get("userId")로 JwtHandshakeInterceptor에서 Attributes로 추가했던 userId를 뽑아서 사용할수있었다.
public void sendMessage(MessageCreateRequestDto requestDto, SimpMessageHeaderAccessor headerAccessor) {
	Long senderId = (Long) headerAccessor.getSessionAttributes().get("userId");
마지막으로 /topic/chat/{chatRoomId} 채팅방에 저장된 메시지를 브로드캐스트한다.
messagingTemplate.convertAndSend("/topic/chat/" + requestDto.getChatRoomId(), savedMessage);
3-4.Service sendMessage
해당 내용은 단순 인증확인, 서비스 비즈니스 로직이므로 설명은 생략한다.
public MessageResponseDto sendMessage(MessageCreateRequestDto requestDto, Long senderId) {
    if(senderId != requestDto.getSenderId()) {
        throw new IllegalArgumentException("Sender ID mismatch");
    }
    Member sender = memberRepository.findById(requestDto.getSenderId())
            .orElseThrow(() -> new IllegalArgumentException("Sender not found"));
    ChatRoom chatRoom = chatRoomRepository.findById(requestDto.getChatRoomId())
            .orElseThrow(() -> new IllegalArgumentException("Chat room not found"));
    Message message = Message.builder()
            .content(requestDto.getContent())
            .sender(sender)
            .chatRoom(chatRoom)
            .timestamp(LocalDateTime.now())
            .build();
    messageRepository.save(message);
    return MessageResponseDto.from(message);
}
4.React
WebSocket을 통해 STOMP 프로토콜을 사용하는 클라이언트를 제공하는 패키지,WebSocket을 지원하지 않는 브라우저에서 SockJS를 통해 WebSocket 대체 기능을 제공하는 패키지 2개를 npm으로 설치한다.
npm install sockjs-client
npm install @stomp/stompjs
vite.config.ts 에 'global': 'window'를 선언하였음
(해당부분은 불확실함, 해당부분은 해서 안되면 추가하고 추후에 내용더 추가할예정)
import react from '@vitejs/plugin-react';
import tailwindcss from "tailwindcss";
import { defineConfig } from 'vite';

// https://vitejs.dev/config/
export default defineConfig({
  plugins: [react()],
  css: {
    postcss: {
      plugins: [tailwindcss()],
    },
  },
  define: {
    'global': 'window',  // global을 window로 정의
  },
});
4-1.WebSocket.ts
WebSocket을 사용하여 STOMP 프로토콜을 통해 서버와 실시간으로 메시지를 주고받는 클라이언트 측 코드다.
import { Client, type Message } from '@stomp/stompjs';
import SockJS from 'sockjs-client';

const SOCKET_URL = "http://localhost:8080/ws";

let stompClient: Client | null = null;

export function connectWebSocket(onMessage: (message: Message) => void, chatRoomId: string) {
  const jwtToken = localStorage.getItem("token");
  if (!jwtToken) {
    console.error(" JWT 토큰이 없습니다. ");
    return;
  }
  console.log(" 웹소켓 연결 시도 중... ", chatRoomId);
  stompClient = new Client({
    brokerURL: undefined,
    webSocketFactory: () => new SockJS(`${SOCKET_URL}?token=${encodeURIComponent(jwtToken)}`),
    reconnectDelay: 5000,
    onConnect: () => {
      console.log(" 웹소켓 연결됨");
      stompClient?.subscribe(`/topic/chat/${chatRoomId}`, onMessage);
    },
    onStompError: (frame) => {
      console.error(" STOMP 에러", frame);
    },
  });

  stompClient.activate();
}

export function sendMessageWebSocket(destination: string, payload: any) {
  if (stompClient && stompClient.connected) {
    stompClient.publish({
      destination,
      body: JSON.stringify(payload),
    });
  }
}

export function disconnectWebSocket() {
  if (stompClient) {
    stompClient.deactivate();
    console.log(" 웹소켓 연결 해제");
  }
}
connectWebSocket
WebSocket 연결을 설정하고, 해당 연결을 통해 메시지를 수신할 준비를하는 함수이다.
stompClient객체를 생성하고 SockJS 객체를 사용하여 WebSocket 연결을 설정한뒤 연결 URL에 JWT 토큰을 쿼리 파라미터로 전달한다.
onConnect: WebSocket 연결이 성공적으로 이루어지면 호출되는 콜백 함수
onStompError: STOMP 프로토콜에서 오류가 발생했을 때 호출되는 콜백 함수
export function connectWebSocket(onMessage: (message: Message) => void, chatRoomId: string) {
  const jwtToken = localStorage.getItem("token");
  if (!jwtToken) {
    console.error(" JWT 토큰이 없습니다. ");
    return;
  }
  console.log(" 웹소켓 연결 시도 중... ", chatRoomId);
  stompClient = new Client({
    brokerURL: undefined,
    webSocketFactory: () => new SockJS(`${SOCKET_URL}?token=${encodeURIComponent(jwtToken)}`),
    reconnectDelay: 5000,
    onConnect: () => {
      console.log(" 웹소켓 연결됨");
      stompClient?.subscribe(`/topic/chat/${chatRoomId}`, onMessage);
    },
    onStompError: (frame) => {
      console.error(" STOMP 에러", frame);
    },
  });

  stompClient.activate();
}
sendMessageWebSocket
WebSocket을 통해 메시지를 전송하는 함수
stompClient.publish()를 사용하여 메시지를 전송한다.
destination: 메시지를 보낼 경로
body: 보내고자 하는 메시지 내용을 JSON 문자열로 직렬화한것
export function sendMessageWebSocket(destination: string, payload: any) {
  if (stompClient && stompClient.connected) {
    stompClient.publish({
      destination,
      body: JSON.stringify(payload),
    });
  }
}
disconnectWebSocket
stompClient.deactivate()로 WebSocket 연결을 종료하는 함수
export function disconnectWebSocket() {
  if (stompClient) {
    stompClient.deactivate();
    console.log(" 웹소켓 연결 해제");
  }
}
4-2.ChatRoom.tsx
해당부분에 대한 설명은 생략한다.
function ChatRoom() {
  const navigate = useNavigate();
  const { id } = useAuthStore();
  const [messages, setMessages] = useState<Message[]>([]);
  const [chatRoom, setChatRoom] = useState<ChatRoom>();
  const [messageInput, setMessageInput] = useState("");
  const [error, setError] = useState("");
  const [loading, setLoading] = useState(false);
  const { chatRoomId } = useParams<{ chatRoomId: string }>();

  const messagesEndRef = useRef<HTMLDivElement>(null);

  // 로그인 검사
  useEffect(() => {
    if (!id) navigate("/login");
  }, [id, navigate]);

  // 초기 메시지 + 채팅방 정보 불러오기
  useEffect(() => {
    const fetchChatRoomMessageList = async () => {
      setLoading(true);
      try {
        if (!chatRoomId) throw new Error("채팅방 ID가 없습니다.");
        const response = await getMessagesByChatRoomId(chatRoomId);
        setMessages(response);
        const responseChatRoom = await getChatRoomById(chatRoomId);
        setChatRoom(responseChatRoom);
      } catch (err: any) {
        setError(err.message);
      }
      setLoading(false);
    };

    fetchChatRoomMessageList();
  }, []);

  // 웹소켓 연결
  useEffect(() => {
    if (!chatRoomId) return;

    connectWebSocket((messageFrame) => {
      const receivedMessage = JSON.parse(messageFrame.body) as Message;
      setMessages((prev) => [...prev, receivedMessage]);
    }, chatRoomId);

    return () => {
      disconnectWebSocket();
    };
  }, [chatRoomId]);

  const handleSendMessage = () => {
    if (!messageInput || !chatRoomId || !id) return;

    const newMessage = {
      chatRoomId: chatRoomId,
      senderId: id,
      content: messageInput,
    };
    console.log("전송할 메시지:", newMessage);

    sendMessageWebSocket("/app/chat/send", newMessage);
    setMessageInput("");
  };

  useEffect(() => {
    // 스크롤 항상 맨 아래로
    messagesEndRef.current?.scrollIntoView({ behavior: "smooth" });
  }, [messages]);

  if (loading) {
    return <div className="flex items-center justify-center w-full h-full">Loading...</div>;
  }

  if (error) {
    return (
      <div className="flex items-center justify-center w-full h-full">
        <div className="bg-red-100 border border-red-400 text-red-700 px-4 py-3 rounded relative" role="alert">
          <span className="block sm:inline">{error}</span>
        </div>
      </div>
    );
  }

  return (
    <div className="flex flex-col w-full h-screen bg-sky-100">
      <div className="flex w-full h-[80px] p-5 bg-sky-300">
        {/* 상단 바 */}
        <button className="bg-sky-200 rounded-full p-2 mr-5" onClick={() => navigate(-1)}>
          ←
        </button>
        <img
          alt="썸네일"
          src="https://i.namu.wiki/i/xYyTBeEJDkq1-rj2273k8lasr9oLaXZmYDUMuU23VKYteYXuIrI0F16e0gTRLIi9GWbVniuNUZ9-taIao3QNJw.svg"
          className="w-[50px] h-full rounded-full bg-black mr-10"
        />
        <h3 className="text-3xl font-semibold">
          {chatRoom?.roomName}
          <a className="text-sm p-3 text-gray-500">{chatRoom?.memberCount}명</a>
        </h3>
      </div>

      {/* 채팅 메시지 영역 */}
      <div className="flex flex-col p-3 gap-5 h-full overflow-auto">
        {messages.map((message) =>
          Number(message.senderId) === id ? (
            <ChatRoomMyChat message={message} key={message.id} />
          ) : (
            <ChatRoomOtherChat message={message} key={message.id} />
          )
        )}
        <div ref={messagesEndRef} />
      </div>

      {/* 메시지 입력 */}
      <div className="bg-gray-100 h-[150px] pl-5 pr-5">
        <div className="h-[100px] flex items-center">
          <input
            className="bg-gray-200 h-[50px] w-full rounded-2xl p-5"
            placeholder="메시지를 입력해주세용"
            value={messageInput}
            onChange={(e) => setMessageInput(e.target.value)}
          />
          <button className="bg-sky-500 w-[100px] h-[50px] rounded-md text-white ml-3" onClick={handleSendMessage}>
            전송
          </button>
        </div>
      </div>
    </div>
  );
}

export default ChatRoom;
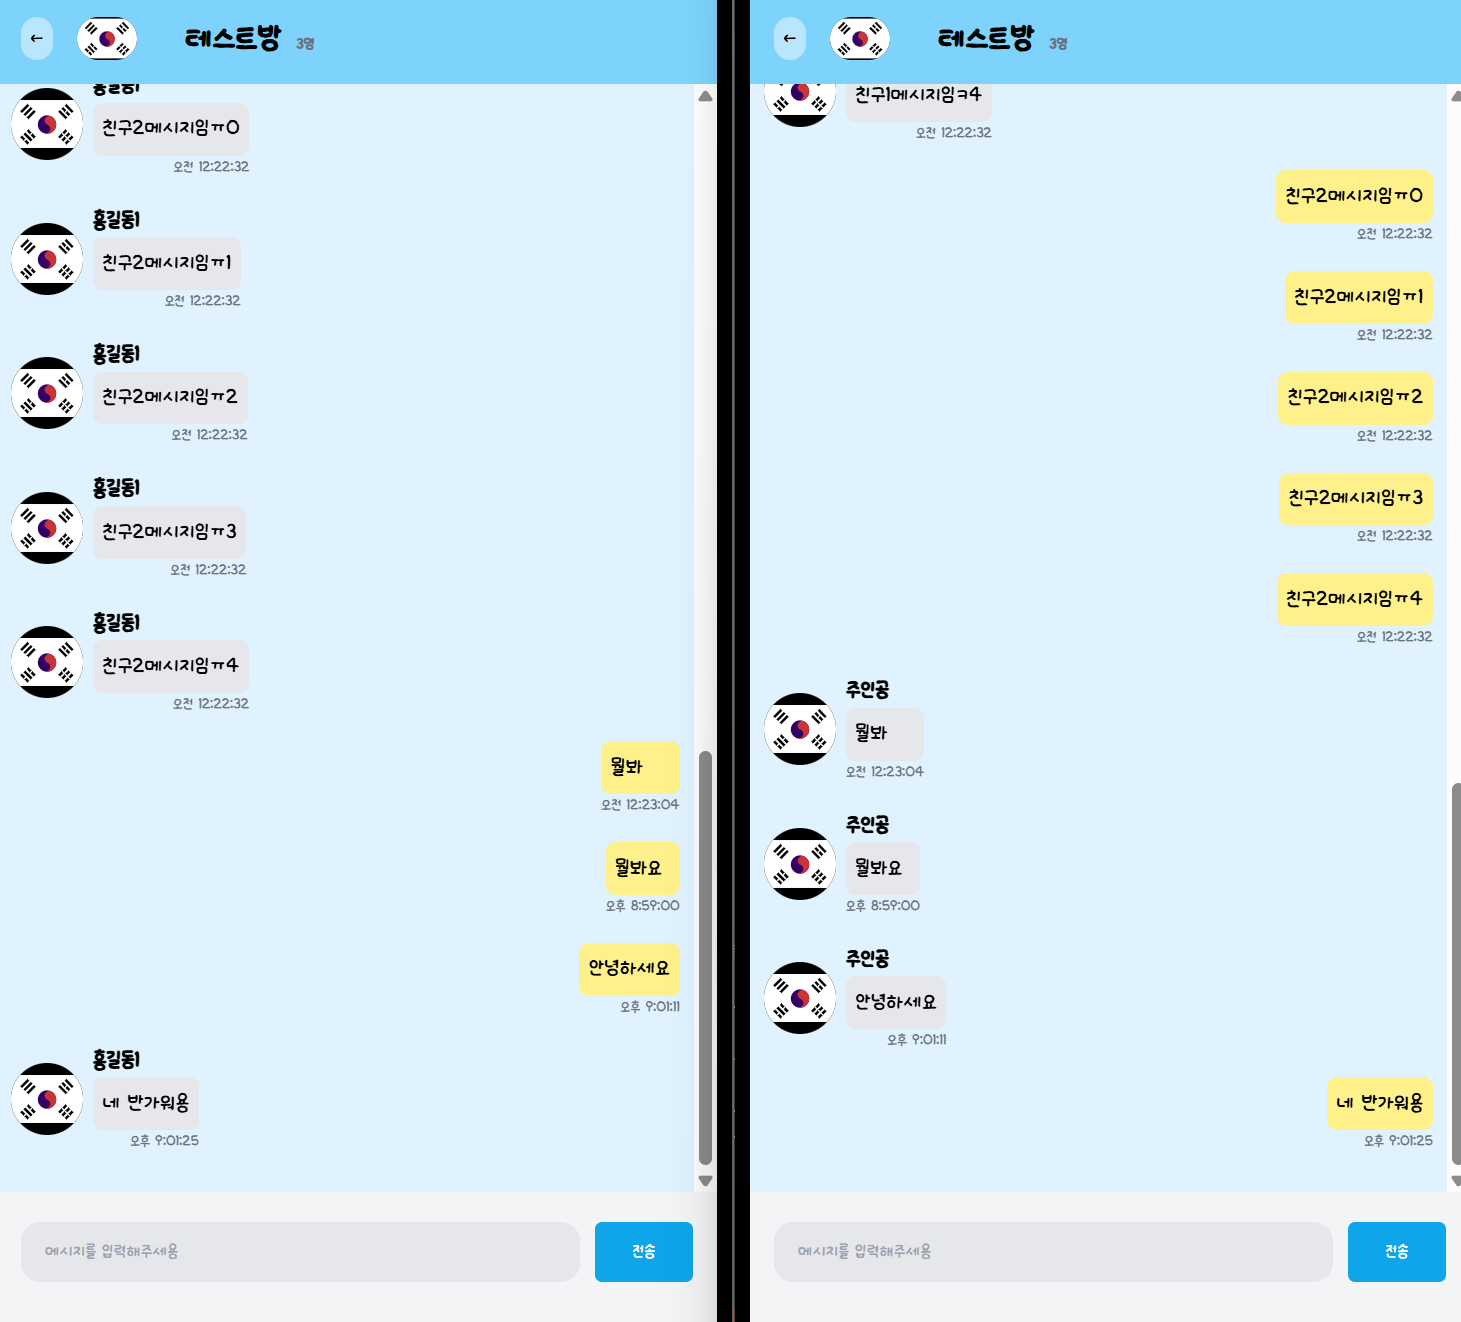
5.결과 테스트
실시간으로 채팅하는 방을 만들었다!


728x90
'BackEnd > SpringBoot' 카테고리의 다른 글
| [SpringBoot] ORM, JPA, 영속성에 대해 (1) | 2025.05.27 |
|---|---|
| [SpringBoot] DI, IOC, Bean 에 대해 (0) | 2025.05.20 |
| [SpringBoot] JDBC 사용하기 (1) | 2025.05.14 |
728x90
1.STOMP(Simple Text Oriented Messaging Protocol)
텍스트 기반의 메시징 프로토콜으로 웹소켓과 함께 사용되어 클라이언트와 서버 간의 실시간 통신을 간편하게 구현할 수 있게 해준다.
STOMP 없이도 WebSocket으로 실시간 소통을 할수 있지만 메시지 라우팅, 구독, 인증 헤더 등이 필요하므로 STOMP를 선택했다.
1-1.STOMP 커맨드
STOMP는 다음과 같은 커맨드들을 지원한다.
| CONNECT | 서버와 연결 시작 |
| SEND | 메시지 발송 |
| SUBSCRIBE | 특정 채널(주제) 구독 |
| UNSUBSCRIBE | 채널 구독 해제 |
| MESSAGE | 서버 → 클라이언트 메시지 전송 |
| DISCONNECT | 연결 종료 |
| ERROR | 에러 메시지 전송 |
1-2. STOMP 메시지 구조
STOMP 메시지는 다음처럼 명령, 헤더, 본문 그리고 종료기호로 구성된다.
명령(Command)

헤더(Header)

본문(Body) + NULL 종료 문자
SEND
destination:/topic/chat
content-type:text/plain
안녕하세요!
^@
2.Pub/Sub (Publish/Subscribe) 구조
Pub/Sub 방식은 발행자(Publisher)와 구독자(Subscriber) 간의 비동기적 메시지 전달 방식이다.
이 방식의 핵심은 보낼 사람과 받을 사람이 서로를 모른 채, 메시지를 중간 시스템이 전달한다는점에 있다.
Pub/Sub 구조에서는 다음과같은 용어를 사용한다.
| Publisher (발행자) | 메시지를 전송하는 주체. 이벤트를 발생시킴 |
| Subscriber (구독자) | 특정 주제(topic)에 관심이 있어 그걸 구독하고 기다리는 주체 |
| Broker (중개자) | 발행자와 구독자 사이에서 메시지를 전달해주는 역할 |
| Topic / Channel | 메시지가 오가는 경로, 하나의 메시지 주제 |
2-1.방식
pub/sub 방식에서는 보낼 사람과 받을 사람이 서로를 모르고 topic에 구독한사람에게 발행하는 형식이다.
만약 다음 처럼 구독자가 topic/channel을 구독했으면
client.subscribe('/topic/notice')
발행자가 해당 topic에 메시지를 발행했을때 브로커가 그 topic을 구독하고 있던 모든 클라이언트에게 메시지를 전달한다.
이 방식때문에 동시에 여러 구독자에게 메시지를 비동기로 전송 가능하여, 채팅방,알림과 같은 방식에서 STOMP + WebSocket에서 많이 쓰인다.
client.send('/app/notice', {}, '공지사항입니다')
3.SpringBoot
웹소켓을 사용하기 위해 사용한 의존성은 다음과같다.
implementation 'org.springframework.boot:spring-boot-starter-websocket'3-1.WebSocketConfig
STOMP + WebSocket + SockJS + JWT 인터셉터를 사용하여 실시간 메시징을 구성하기 위한 WebSocket 설정을 위한 클래스다.
@Configuration
@EnableWebSocketMessageBroker // 웹소켓 메시지 브로커 활성화
public class WebSocketConfig implements WebSocketMessageBrokerConfigurer {
    @Autowired
    private JwtHandshakeInterceptor jwtHandshakeInterceptor;

    @Override
    public void configureMessageBroker(@NonNull MessageBrokerRegistry config) {
        config.enableSimpleBroker("/topic");
        config.setApplicationDestinationPrefixes("/app");
    }

    @Override
    public void registerStompEndpoints(@NonNull StompEndpointRegistry registry) {
        registry.addEndpoint("/ws")
                .setAllowedOrigins("http://localhost:5173", "http://localhost:8080", "http://127.0.0.1:3000")
                .addInterceptors(jwtHandshakeInterceptor)
                .withSockJS();
    }

}
configureMessageBroker
해당 메서드는 MessageBroker에 대한 설정을 해준다.
enableSimpleBroker("/topic") 통해 메시지를 구독자에게 브로드캐스트할 때 사용하는 내장 브로커 활성화하였다.
(/topic/chatroom/1 과같은 형식으로 구독가능)
setApplicationDestinationPrefixes("/app")을 통해 클라이언트가 서버로 보내는 메시지의 prefix 설정을 하였다.
(클라이언트가 /app/sendMessage로 보내면, 컨트롤러의 @MessageMapping("/sendMessage")로 라우팅)
@Override
public void configureMessageBroker(@NonNull MessageBrokerRegistry config) {
    config.enableSimpleBroker("/topic");
    config.setApplicationDestinationPrefixes("/app");
}
registerStompEndpoints
Stomp의 엔드포인트와 관련된 설정을 하는 엔드포인트다.
| addEndpoint("/ws") | 클라이언트가 WebSocket 연결을 시작할 엔드포인트 경로 |
| setAllowedOrigins(...) | CORS 허용 도메인을 명시 |
| addInterceptors(...) | WebSocket 연결 시 실행될 JWT 인증 인터셉터를 등록 |
| withSockJS() | 브라우저가 WebSocket을 지원하지 않을 경우 대체 방식(XHR 등)을 자동으로 지원 |
@Override
public void registerStompEndpoints(@NonNull StompEndpointRegistry registry) {
    registry.addEndpoint("/ws")
            .setAllowedOrigins("http://localhost:5173", "http://localhost:8080", "http://127.0.0.1:3000")
            .addInterceptors(jwtHandshakeInterceptor)
            .withSockJS();
}
지금을 보면 다음과같은 흐름도로 작동할 것이다.
[클라이언트] --(웹소켓/STOMP 연결 시도)--> /ws
                       │
                       ▼
       [JwtHandshakeInterceptor] → JWT 토큰 검증 (WebSocket 핸드셰이크 중)
                       │
                       ▼
       [STOMP 연결 완료 후 메시지 송수신 시작]
                       │
                       ├──▶ SEND → /app/message
                       │           │
                       │           ▼
                       │   @MessageMapping("/message") → 서버 로직 수행
                       │                           │
                       │                           └→ 결과를 /topic/chatroom으로 전송
                       │
                       └──▶ SUBSCRIBE → /topic/chatroom
                                   │
                                   ▼
                          브로커가 구독 중인 클라이언트들에게 메시지 PUSH
3-2.JwtHandshakeInterceptor
WebSocket 연결 시 JWT 기반 인증을 처리하는 클래스이다.
지금은 쿼리스트링으로 JWT를 받아처리하는 방식으로 구현하였다.
@Component
@Slf4j
public class JwtHandshakeInterceptor implements HandshakeInterceptor {

    private final JwtTokenProvider jwtTokenProvider;

    @Autowired
    public JwtHandshakeInterceptor(JwtTokenProvider jwtTokenProvider) {
        this.jwtTokenProvider = jwtTokenProvider;
    }

    @Override
    public boolean beforeHandshake(ServerHttpRequest request, ServerHttpResponse response,
                                 WebSocketHandler wsHandler, Map<String, Object> attributes) throws Exception {
        // Query parameter에서 토큰 추출
        String token = getTokenFromQuery(request);

        if (token != null && jwtTokenProvider.validateToken(token)) {
            // 토큰이 유효하면 사용자 정보를 attributes에 저장
            String email = jwtTokenProvider.getEmailFromToken(token);
            String role = jwtTokenProvider.getRoleFromToken(token);
            Long userId = jwtTokenProvider.getIdFromToken(token);

            attributes.put("email", email);
            attributes.put("role", role);
            attributes.put("userId", userId);
            return true;
        }
        log.error("No token found in query parameters");
        return false; // 인증 실패시 연결 거부
    }

    private String getTokenFromQuery(ServerHttpRequest request) {
        String query = request.getURI().getQuery();
        if (query != null) {
            String[] params = query.split("&");
            for (String param : params) {
                if (param.startsWith("token=")) {
                    return param.substring(6); // "token=" 제거
                }
            }
        }
        return null;
    }

    @Override
    public void afterHandshake(ServerHttpRequest request, ServerHttpResponse response,
                             WebSocketHandler wsHandler, Exception exception) {
        // 핸드셰이크 후 처리 (필요시)
    }
}
beforeHandshake
WebSocket 핸드셰이크이전에 작업하는 메서드이다. (true 반환시 연결허용, false 반환시 연결 거부)
요청 URL의 쿼리 파라미터에서 token을 추출하고, token을 기반으로 email,role,userId를 뽑아서 attributes 맵에 넣어서
WebSocket 세션에 저장하고 true를 반환해 연결을 허용하고, token이 유효하지않거나 없으면 false를 반환한다.
@Override
public boolean beforeHandshake(ServerHttpRequest request, ServerHttpResponse response,
                             WebSocketHandler wsHandler, Map<String, Object> attributes) throws Exception {
    // Query parameter에서 토큰 추출
    String token = getTokenFromQuery(request);

    if (token != null && jwtTokenProvider.validateToken(token)) {
        // 토큰이 유효하면 사용자 정보를 attributes에 저장
        String email = jwtTokenProvider.getEmailFromToken(token);
        String role = jwtTokenProvider.getRoleFromToken(token);
        Long userId = jwtTokenProvider.getIdFromToken(token);

        attributes.put("email", email);
        attributes.put("role", role);
        attributes.put("userId", userId);
        return true;
    }
    log.error("No token found in query parameters");
    return false; // 인증 실패시 연결 거부
}
getTokenFromQuery
URL 쿼리스트링에서 token값을 추출해내기 위한 메서드
private String getTokenFromQuery(ServerHttpRequest request) {
    String query = request.getURI().getQuery();
    if (query != null) {
        String[] params = query.split("&");
        for (String param : params) {
            if (param.startsWith("token=")) {
                return param.substring(6); // "token=" 제거
            }
        }
    }
    return null;
}
afterHandshake
핸드셰이크 이후의 작업을 정의할 수 있는 메서드인데 따로 만들지는않았다.
(필수 오버라이드 해야하는 메서드라 스켈레톤코드로 구현만 해놨다.)
@Override
public void afterHandshake(ServerHttpRequest request, ServerHttpResponse response,
                         WebSocketHandler wsHandler, Exception exception) {
    // 핸드셰이크 후 처리 (필요시)
}
3-3.MessageWebSocketController
메시지 처리 로직을 구현하는 Controller다.
@RestController로 하면 안되기 때문에 @Controller로 만들었다.
@Controller
@RequiredArgsConstructor
public class MessageWebSocketController {
    private final SimpMessagingTemplate messagingTemplate;
    private final MessageService messageService;

    @MessageMapping("/chat/send")
    public void sendMessage(MessageCreateRequestDto requestDto, SimpMessageHeaderAccessor headerAccessor) {
        Long senderId = (Long) headerAccessor.getSessionAttributes().get("userId");
        MessageResponseDto savedMessage = messageService.sendMessage(requestDto,senderId);
        messagingTemplate.convertAndSend("/topic/chat/" + requestDto.getChatRoomId(), savedMessage);
    }
}
클라이언트가 /app/chat/send 경로로 전송한 메시지를 처리하는 메서드를 선언하기위해 다음처럼 설정한다.
@MessageMapping("/chat/send")
SimpMessageHeaderAccessor headerAccessor를 매개변수로 받아서 헤더에 있는 추가 정보를 얻을 수있다.
이를 통해 headerAccessor.getSessionAttributes().get("userId")로 JwtHandshakeInterceptor에서 Attributes로 추가했던 userId를 뽑아서 사용할수있었다.
public void sendMessage(MessageCreateRequestDto requestDto, SimpMessageHeaderAccessor headerAccessor) {
	Long senderId = (Long) headerAccessor.getSessionAttributes().get("userId");
마지막으로 /topic/chat/{chatRoomId} 채팅방에 저장된 메시지를 브로드캐스트한다.
messagingTemplate.convertAndSend("/topic/chat/" + requestDto.getChatRoomId(), savedMessage);
3-4.Service sendMessage
해당 내용은 단순 인증확인, 서비스 비즈니스 로직이므로 설명은 생략한다.
public MessageResponseDto sendMessage(MessageCreateRequestDto requestDto, Long senderId) {
    if(senderId != requestDto.getSenderId()) {
        throw new IllegalArgumentException("Sender ID mismatch");
    }
    Member sender = memberRepository.findById(requestDto.getSenderId())
            .orElseThrow(() -> new IllegalArgumentException("Sender not found"));
    ChatRoom chatRoom = chatRoomRepository.findById(requestDto.getChatRoomId())
            .orElseThrow(() -> new IllegalArgumentException("Chat room not found"));
    Message message = Message.builder()
            .content(requestDto.getContent())
            .sender(sender)
            .chatRoom(chatRoom)
            .timestamp(LocalDateTime.now())
            .build();
    messageRepository.save(message);
    return MessageResponseDto.from(message);
}
4.React
WebSocket을 통해 STOMP 프로토콜을 사용하는 클라이언트를 제공하는 패키지,WebSocket을 지원하지 않는 브라우저에서 SockJS를 통해 WebSocket 대체 기능을 제공하는 패키지 2개를 npm으로 설치한다.
npm install sockjs-client
npm install @stomp/stompjs
vite.config.ts 에 'global': 'window'를 선언하였음
(해당부분은 불확실함, 해당부분은 해서 안되면 추가하고 추후에 내용더 추가할예정)
import react from '@vitejs/plugin-react';
import tailwindcss from "tailwindcss";
import { defineConfig } from 'vite';

// https://vitejs.dev/config/
export default defineConfig({
  plugins: [react()],
  css: {
    postcss: {
      plugins: [tailwindcss()],
    },
  },
  define: {
    'global': 'window',  // global을 window로 정의
  },
});
4-1.WebSocket.ts
WebSocket을 사용하여 STOMP 프로토콜을 통해 서버와 실시간으로 메시지를 주고받는 클라이언트 측 코드다.
import { Client, type Message } from '@stomp/stompjs';
import SockJS from 'sockjs-client';

const SOCKET_URL = "http://localhost:8080/ws";

let stompClient: Client | null = null;

export function connectWebSocket(onMessage: (message: Message) => void, chatRoomId: string) {
  const jwtToken = localStorage.getItem("token");
  if (!jwtToken) {
    console.error(" JWT 토큰이 없습니다. ");
    return;
  }
  console.log(" 웹소켓 연결 시도 중... ", chatRoomId);
  stompClient = new Client({
    brokerURL: undefined,
    webSocketFactory: () => new SockJS(`${SOCKET_URL}?token=${encodeURIComponent(jwtToken)}`),
    reconnectDelay: 5000,
    onConnect: () => {
      console.log(" 웹소켓 연결됨");
      stompClient?.subscribe(`/topic/chat/${chatRoomId}`, onMessage);
    },
    onStompError: (frame) => {
      console.error(" STOMP 에러", frame);
    },
  });

  stompClient.activate();
}

export function sendMessageWebSocket(destination: string, payload: any) {
  if (stompClient && stompClient.connected) {
    stompClient.publish({
      destination,
      body: JSON.stringify(payload),
    });
  }
}

export function disconnectWebSocket() {
  if (stompClient) {
    stompClient.deactivate();
    console.log(" 웹소켓 연결 해제");
  }
}
connectWebSocket
WebSocket 연결을 설정하고, 해당 연결을 통해 메시지를 수신할 준비를하는 함수이다.
stompClient객체를 생성하고 SockJS 객체를 사용하여 WebSocket 연결을 설정한뒤 연결 URL에 JWT 토큰을 쿼리 파라미터로 전달한다.
onConnect: WebSocket 연결이 성공적으로 이루어지면 호출되는 콜백 함수
onStompError: STOMP 프로토콜에서 오류가 발생했을 때 호출되는 콜백 함수
export function connectWebSocket(onMessage: (message: Message) => void, chatRoomId: string) {
  const jwtToken = localStorage.getItem("token");
  if (!jwtToken) {
    console.error(" JWT 토큰이 없습니다. ");
    return;
  }
  console.log(" 웹소켓 연결 시도 중... ", chatRoomId);
  stompClient = new Client({
    brokerURL: undefined,
    webSocketFactory: () => new SockJS(`${SOCKET_URL}?token=${encodeURIComponent(jwtToken)}`),
    reconnectDelay: 5000,
    onConnect: () => {
      console.log(" 웹소켓 연결됨");
      stompClient?.subscribe(`/topic/chat/${chatRoomId}`, onMessage);
    },
    onStompError: (frame) => {
      console.error(" STOMP 에러", frame);
    },
  });

  stompClient.activate();
}
sendMessageWebSocket
WebSocket을 통해 메시지를 전송하는 함수
stompClient.publish()를 사용하여 메시지를 전송한다.
destination: 메시지를 보낼 경로
body: 보내고자 하는 메시지 내용을 JSON 문자열로 직렬화한것
export function sendMessageWebSocket(destination: string, payload: any) {
  if (stompClient && stompClient.connected) {
    stompClient.publish({
      destination,
      body: JSON.stringify(payload),
    });
  }
}
disconnectWebSocket
stompClient.deactivate()로 WebSocket 연결을 종료하는 함수
export function disconnectWebSocket() {
  if (stompClient) {
    stompClient.deactivate();
    console.log(" 웹소켓 연결 해제");
  }
}
4-2.ChatRoom.tsx
해당부분에 대한 설명은 생략한다.
function ChatRoom() {
  const navigate = useNavigate();
  const { id } = useAuthStore();
  const [messages, setMessages] = useState<Message[]>([]);
  const [chatRoom, setChatRoom] = useState<ChatRoom>();
  const [messageInput, setMessageInput] = useState("");
  const [error, setError] = useState("");
  const [loading, setLoading] = useState(false);
  const { chatRoomId } = useParams<{ chatRoomId: string }>();

  const messagesEndRef = useRef<HTMLDivElement>(null);

  // 로그인 검사
  useEffect(() => {
    if (!id) navigate("/login");
  }, [id, navigate]);

  // 초기 메시지 + 채팅방 정보 불러오기
  useEffect(() => {
    const fetchChatRoomMessageList = async () => {
      setLoading(true);
      try {
        if (!chatRoomId) throw new Error("채팅방 ID가 없습니다.");
        const response = await getMessagesByChatRoomId(chatRoomId);
        setMessages(response);
        const responseChatRoom = await getChatRoomById(chatRoomId);
        setChatRoom(responseChatRoom);
      } catch (err: any) {
        setError(err.message);
      }
      setLoading(false);
    };

    fetchChatRoomMessageList();
  }, []);

  // 웹소켓 연결
  useEffect(() => {
    if (!chatRoomId) return;

    connectWebSocket((messageFrame) => {
      const receivedMessage = JSON.parse(messageFrame.body) as Message;
      setMessages((prev) => [...prev, receivedMessage]);
    }, chatRoomId);

    return () => {
      disconnectWebSocket();
    };
  }, [chatRoomId]);

  const handleSendMessage = () => {
    if (!messageInput || !chatRoomId || !id) return;

    const newMessage = {
      chatRoomId: chatRoomId,
      senderId: id,
      content: messageInput,
    };
    console.log("전송할 메시지:", newMessage);

    sendMessageWebSocket("/app/chat/send", newMessage);
    setMessageInput("");
  };

  useEffect(() => {
    // 스크롤 항상 맨 아래로
    messagesEndRef.current?.scrollIntoView({ behavior: "smooth" });
  }, [messages]);

  if (loading) {
    return <div className="flex items-center justify-center w-full h-full">Loading...</div>;
  }

  if (error) {
    return (
      <div className="flex items-center justify-center w-full h-full">
        <div className="bg-red-100 border border-red-400 text-red-700 px-4 py-3 rounded relative" role="alert">
          <span className="block sm:inline">{error}</span>
        </div>
      </div>
    );
  }

  return (
    <div className="flex flex-col w-full h-screen bg-sky-100">
      <div className="flex w-full h-[80px] p-5 bg-sky-300">
        {/* 상단 바 */}
        <button className="bg-sky-200 rounded-full p-2 mr-5" onClick={() => navigate(-1)}>
          ←
        </button>
        <img
          alt="썸네일"
          src="https://i.namu.wiki/i/xYyTBeEJDkq1-rj2273k8lasr9oLaXZmYDUMuU23VKYteYXuIrI0F16e0gTRLIi9GWbVniuNUZ9-taIao3QNJw.svg"
          className="w-[50px] h-full rounded-full bg-black mr-10"
        />
        <h3 className="text-3xl font-semibold">
          {chatRoom?.roomName}
          <a className="text-sm p-3 text-gray-500">{chatRoom?.memberCount}명</a>
        </h3>
      </div>

      {/* 채팅 메시지 영역 */}
      <div className="flex flex-col p-3 gap-5 h-full overflow-auto">
        {messages.map((message) =>
          Number(message.senderId) === id ? (
            <ChatRoomMyChat message={message} key={message.id} />
          ) : (
            <ChatRoomOtherChat message={message} key={message.id} />
          )
        )}
        <div ref={messagesEndRef} />
      </div>

      {/* 메시지 입력 */}
      <div className="bg-gray-100 h-[150px] pl-5 pr-5">
        <div className="h-[100px] flex items-center">
          <input
            className="bg-gray-200 h-[50px] w-full rounded-2xl p-5"
            placeholder="메시지를 입력해주세용"
            value={messageInput}
            onChange={(e) => setMessageInput(e.target.value)}
          />
          <button className="bg-sky-500 w-[100px] h-[50px] rounded-md text-white ml-3" onClick={handleSendMessage}>
            전송
          </button>
        </div>
      </div>
    </div>
  );
}

export default ChatRoom;
5.결과 테스트
실시간으로 채팅하는 방을 만들었다!
728x90
'BackEnd > SpringBoot' 카테고리의 다른 글
| [SpringBoot] ORM, JPA, 영속성에 대해 (1) | 2025.05.27 |
|---|---|
| [SpringBoot] DI, IOC, Bean 에 대해 (0) | 2025.05.20 |
| [SpringBoot] JDBC 사용하기 (1) | 2025.05.14 |